
How to Build a STEM Summer Camp with Robots (No Experience Needed)
May 6, 2025
Think Like an Engineer: Celebrating International Women in Engineering Day
June 1, 2025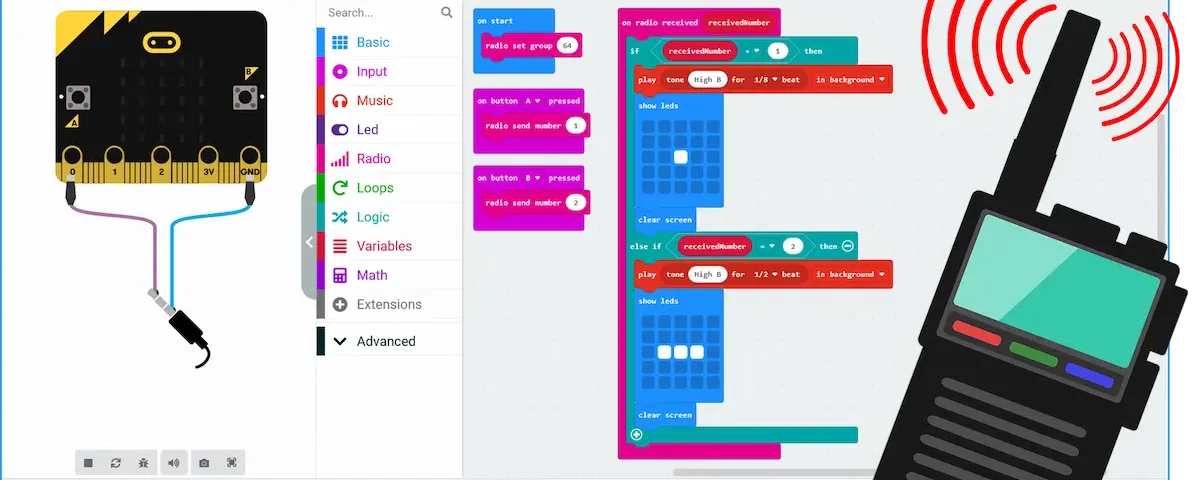
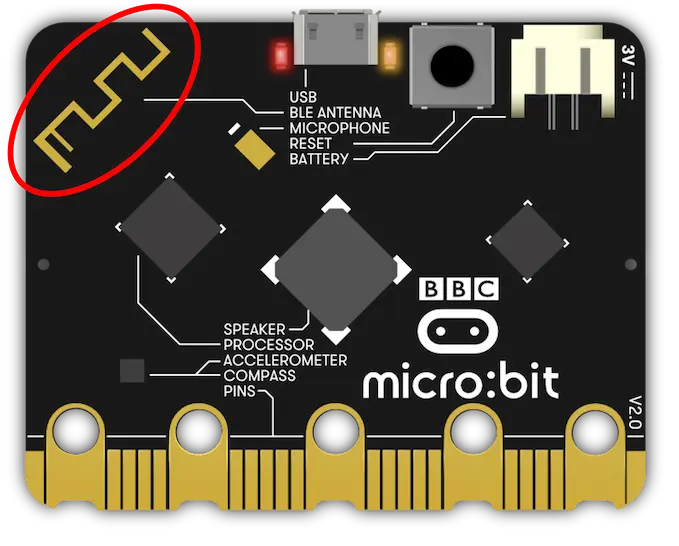
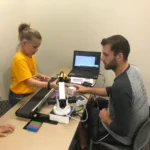
Figure 1
Hello everyone! As you may remember, a while back I wrote a blog about some of the amazing capabilities of the micro:bit – specifically, how the micro:bit can be programmed to function as a compass through the power of block coding. Well, today I’m back to tell you about another extraordinary feature of this mini but mighty microcontroller: radio communication!
That’s right! Thanks to a tiny antenna built into the back of each unit, the micro:bit has the ability to wirelessly communicate with other micro:bits via radio waves. And incorporating this feature into the classroom is not only a great way to teach students about block coding (and computer programming in general), but it also provides a great opportunity for them to learn about electromagnetic waves, Morse code, and binary! So, get ready to be a secret agent, and let’s take a look at how the micro:bit’s radio communication feature can be applied to a classroom setting!
Getting Started
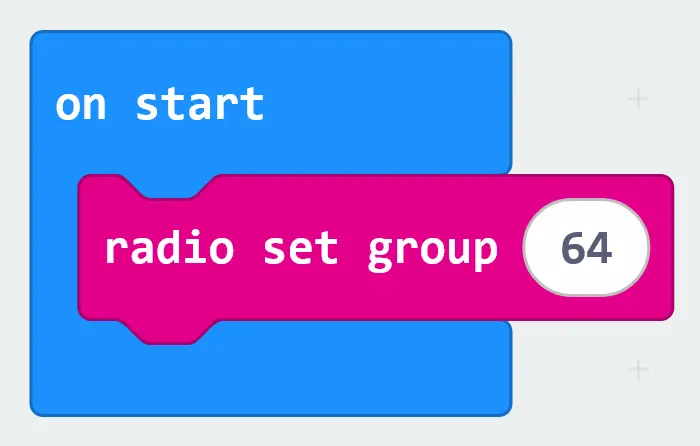
Figure 2
Start by instructing your students to visit makecode.microbit.org and have them open a new project in MakeCode. Students will want to start by placing a radio set group block (located in the MakeCode Radio tab) into their on start block. The number that students enter into their radio set group block will determine the channel that they will be communicating on. By assigning different channel numbers to different groups, this feature ensures that signals don’t get crossed between groups in your classroom! (I always pick “64,” in honor of the Nintendo 64, of course.) (Figure 2)
(Next, students will need to program their micro:bits to both send and receive radio signals. That means that there will be no designated “sending micro:bits” or “receiving micro:bits.” Instead, any micro:bit with the final code loaded onto it can both send and receive radio signals with other micro:bits, just as long as those micro:bits share the same channel number!)
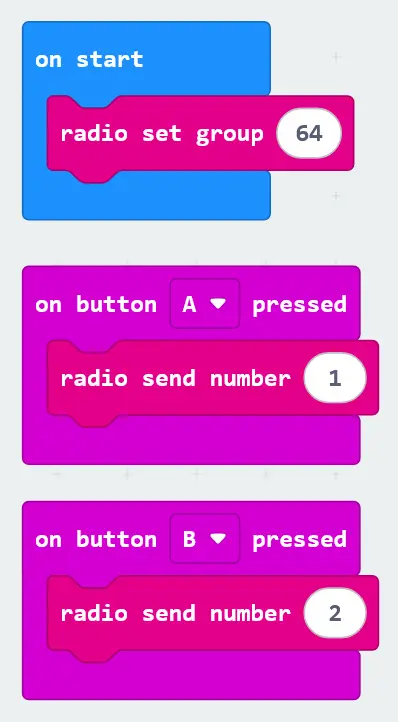
Figure 3
Sending Radio Signals
Now it’s time to program the inputs that will trigger our micro:bits to send out radio signals. Students will want to grab a couple of on button pressed blocks from the Input tab and place a radio send number block into each. After some minor tweaking, you can see in the code to the right that pressing the A button on our micro:bit will send out a value of “1” via radio waves, and pressing the B button will send out a value of “2.” You can most certainly program your micro:bit to send out and receive more than two kinds of signals, but for reasons you’ll soon see, I’ll be keeping things simple for us this time!
Receiving Radio Signals
At this point, we’ve successfully programmed our micro:bits to send out radio signals, but what about receiving radio signals? In this section, we’ll be programming the output behaviors of our micro:bits upon receiving radio signals.
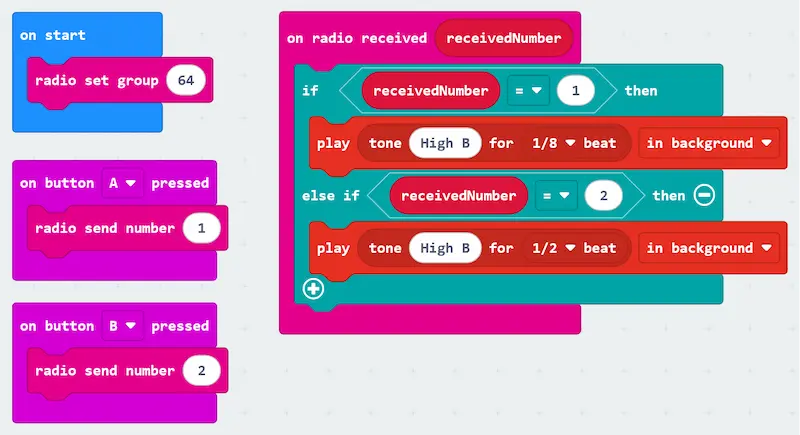
Figure 4
Students will need to grab an on-air radio receiver block from the Radio tab. Because we are sending numerical values between our micro:bits (as opposed to string values), students will specifically need to select the on radio received block associated with the receivedNumber variable. You see, upon receiving a radio signal, the numerical value being transmitted via the received radio waves will be automatically assigned to our receivedNumber variable. (Figure 4)
Next, we need to determine what our micro:bit will do when receiving a “1” signal versus a “2” signal. Students will need to retrieve an if-then-else-if-then conditional block from the Logic tab and place it inside of their on radio received block. As you can see in the code above, I’ve used blocks from the Music tab to program my micro:bit to produce different sound outputs depending on the signal received. When receiving a “1” signal (i.e., when another person presses the A button on their micro:bit), my micro:bit will play a high B tone for 1/8 of a beat. And when receiving a “2” signal (i.e., when another person presses the B button on their micro:bit), my micro:bit will play a high B tone for half of a beat. But why? …
Block Coding, Morse Code, and Binary
Have you caught on to what I’m doing with this program yet? That’s right: it’s Morse code! Pressing the A and B buttons on one micro:bit will cause another micro:bit to produce a short beep (a “dot”) or a longer beep (a “dash”), respectively. And to really drive this Morse code theme home, students can add show LED blocks into their code to display a dot or a dash on the micro:bit’s built-in LED matrix! (See code in Figure 5.)
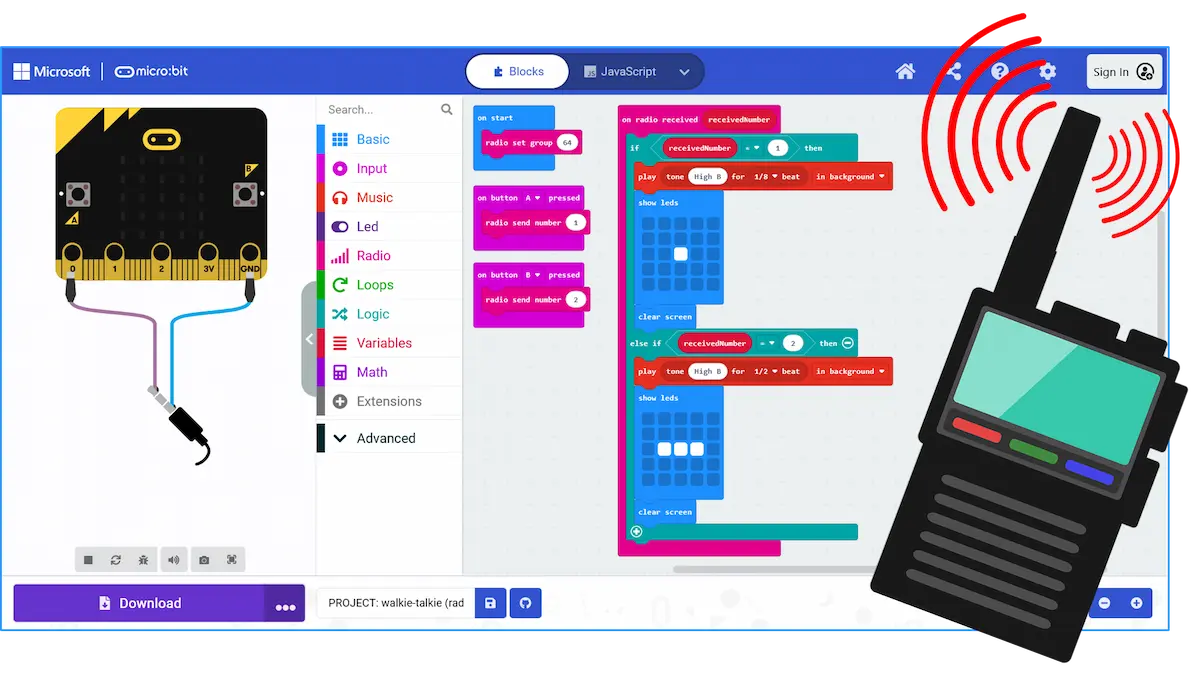
Figure 5
Now, this incorporation of Morse code into a micro:bit coding activity is not only a great way to slip a bit of history into your computer science classroom. Morse code itself is also a great way to introduce students to another computer science concept: binary! You see, Morse code and binary are both languages that employ only two characters to achieve communication (dots and dashes for Morse code and 1s and 0s for binary). Because of this, teaching students the basics of Morse code can be a terrific way to help them understand how computers use binary to carry out the instructions we give to them in the form of code! Pretty full circle, huh?
Conclusion
I often refer to the micro:bit as the “Swiss Army knife” of coding education. And I hope you can see why. With its many built-in features and plethora of input and output options, this tiny microcontroller is the perfect multi-tool to help students along their journey through the world of computer programming. While block coding is great for teaching early learners the basics of coding without complicated syntax getting in the way, the ability to code in JavaScript and Python in the MakeCode application can be a great way for more experienced learners to take their coding to the next level!
If you’re interested in incorporating the micro:bit and micro:bit accessories into your classroom, be sure to visit our website! And for long-term, project-based learning built around the micro:bit, be sure to check out our Build Smart courses and kits!
Until next time. Happy coding!
– Dr. Jake Roark


